 |
|

| Manual |
|||||
The Beginning • Overview • Getting Started HammerKit Tools • The Component Editor • Understanding Component Types Component Templates Creating Content Component Advanced Component Settings • The Style Manager • Working with Styles & Colors Creating a New Style Adding a New Color • The File Manager Folder Actions File Actions • The Keyword Manager • Settings Manager • Data Manager Creating & Using Data Entering Data Output Data Elements HammerKit Elements • Creating Content with Elements • Adding text • Adding Images • Cut, Copy & Paste User Manager • Defining Users, Groups & Access Rights • Adding groups • Removing Groups HammerScript • Syntax • Constructors & Variables Scopes |
Creating and using data in your web service
Data Classes, Attributes and Objects If you are familiar with database structures, you might have heard of these concepts described as tables, fields and data.
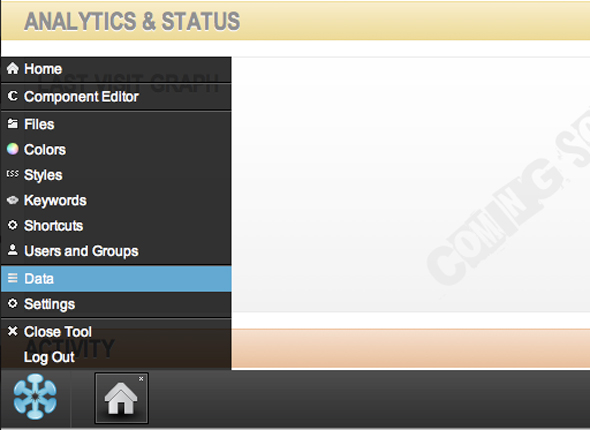
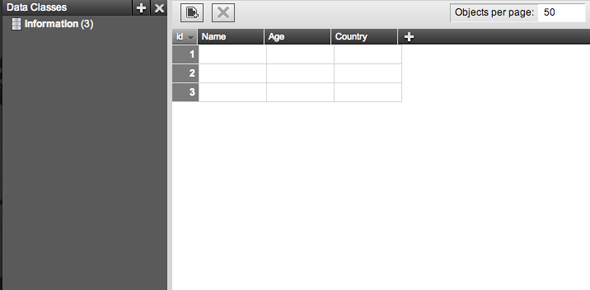
Creating a Data Class + open the data manager by selecting ʻDataʼ from the start button menu
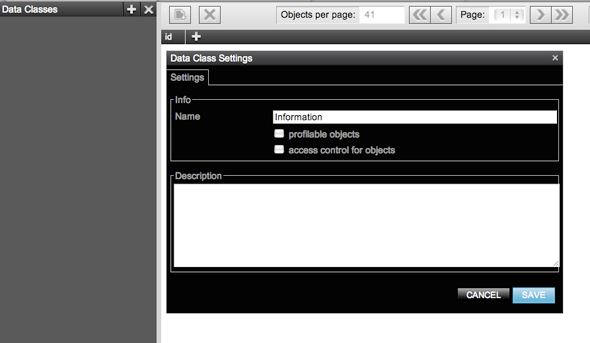
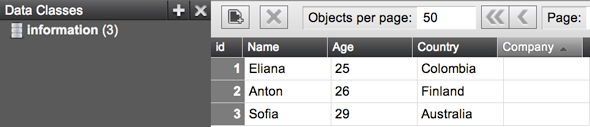
Adding Attributes to a Data Class + double-click the data class to open it on the data manager canvas + click the ʻ+ʼ sign above the canvas next to the ʻidʼ field. ʻidʼ is an automatically generated field that adds a reference to each row of your database + a properties box will appear. Type a name for your data class and select a data type using the select box + click ʻSaveʼ to add the attribute + You can continue to add as many attributes as you need to store the data you want to keep. The data types can be text, numbers, dates, etc. and you can choosethe correct type for the data you expect in that field.
Removing an Attributes
+ right-click on the attribute name shown in the data grid |


Product
|
Company
|
Community
|
Awards
|
|||||||||||||||||||||||||||||||||||||||||||||||||||||||||||||||||||||||||||||||


